Removing and changing the backgrounds are two of the most common tasks for editing any image. It becomes very crucial when the raw background is offering nothing but lifelessness and a dull vibe. To eliminate these unwanted things, changing the raw image background is mandatory. Its necessity increases when it comes to product photography editing or online image showcasing.
Photoshop is the best software for background changing because of its vast collection of tools and techniques. Learning in detail about how to change background in Photoshop is the fundamental lesson of image editing. Without the proper knowledge, it may look challenging. But when you get to know more, the whole background changing process becomes much easier.
Why Should I Use Photoshop for Changing any Image Background?
Photoshop is the best tool to use if you want to remove any image background with the mind of replacing it. In this software, you will find a vast collection of tools for retouching work on your image. From color correction to background changing, Photoshop has tools for each section of editing.
As we are talking about background changing, let’s give you an example about this sector. Photoshop offers four different methods for background removal and replacement process with four different tools. You can use the “Pen Tool” for creating a selection around the subject. It is a manual method for isolating the image subject.
There are three more tools for subject image isolation. You can use either the “Object Selection Tool” or the “Magic Wand Tool” when the subject and background are single-colored and straightforward. There is another option available for you in this case: the “Quick Selection Tool,” and it is the most used one.
Which Tools and Methods to use for Background Changing in Photoshop?
If you want to change the image background, you need to eliminate the raw background first. And for eliminating the background, you need to create a selection around the subject to isolate it. Finally, as it is the major part of background changing, you need to select just the right tool capable of making the proper selection.
You can go with the “Pen Tool,” but the selection process will be a bit longer. At the same time, you need to be highly experienced and errorless. If you are pretty new to the “Pen Tool,” you should avoid it for professional background changing. Instead, practice with this tool more and more to gain perfection.
You can think of using the “Object Selection Tool” or the “Magic Wand Tool.” But these two tools perform well when the background and subject are simple and mostly single-colored. However, when the subject or the background is a gradient or has multiple colors, the performance of these two tools fades away a bit.
Now, we are left with another selection tool, the most used one, the “Quick Selection Tool.” Maximum professional photo editors use this fantastic tool to get rid of unwanted backgrounds. The using procedure of this tool is quite simple, and you can apply for background removal no matter what the subject and background are.
How to Change Background in Photoshop – The Steps You Need to Follow
Background changing is the essential task of the whole image editing process. But without following the correct steps, this simplest editing task will look tough. You won’t even be able to select the area you want to keep, let alone achieve your desired result.
When you know about the necessary tools, you will know when to use which one. It will help you stay in the correct way of background changing. The essential steps you need to follow for getting the background changing work done are:
Step-1: Open Photoshop and Import Your Desired Image
On your computer, you need to have the latest version of Adobe Photoshop installed. Open it first, and the whole window of Photoshop will be in front of you. After accessing it, you need to import the image in Photoshop from which you want to eliminate the raw background and add a new one.
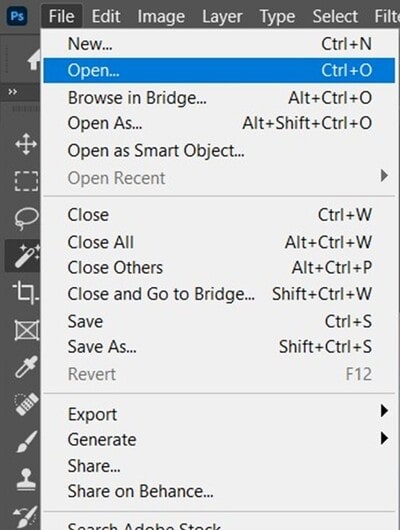
From the top menu bar of the Photoshop window, locate the “File” option and click on it. After doing so, a new option tab will pop up on your screen, and select “Open” from there. It will direct you to your computer’s media files section, and you will have to select your desired image. Then press “Import” to open that image on Photoshop.
Step-2: Locate the Quick Selection Tool
You won’t always get images with a simple subject and background. So, always working with the “Magic Wand Tool” and “Object Selection Tool” won’t help in all cases. That’s why my suggestion is to do the image subject’s selection work with the “Quick Selection Tool.”
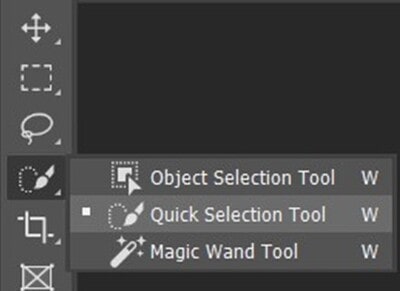
As you will import your desired image in Photoshop, you will see a “Toolbar” at the left of the Photoshop tab. From there, you need to find out the “Object Selection Tool” first and then click on it. You can face some issues while finding that tool because of the significant tool collection.
Don’t worry then; press the “W” button from your keyboard, and it will direct you to the “Object Selection Tool.” After entering there, you will find three different selection tools, one after another. The second one from that tool list will be the “Quick Selection Tool” you require for the background changing task.
Click on it to access, and then you can use it to do the subject selection work from your imported image.
Step-3: Select the Subject Area from the Image
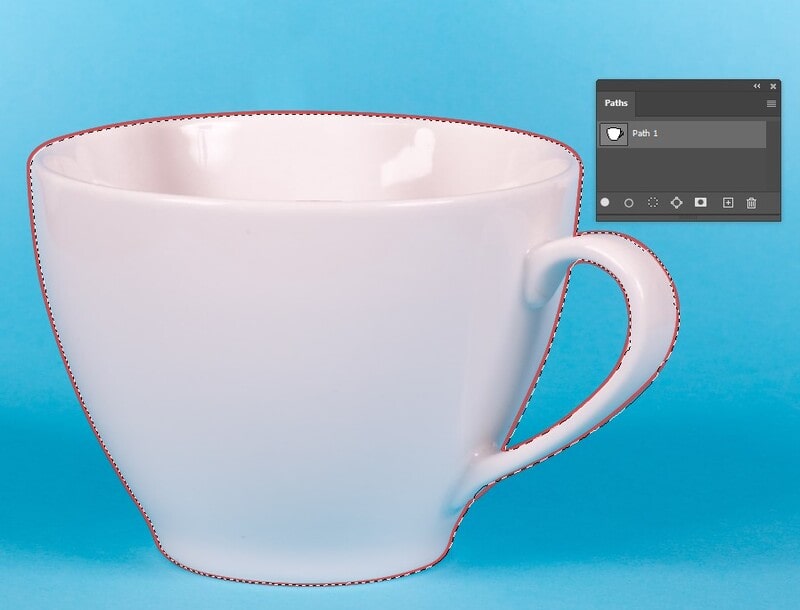
As you access the “Quick Selection Tool,” you will see that your mouse cursor has taken a new shape. That shape will be like a circle containing the “Plus” (+) sign in the middle of it. By using this tool, drag that cursor all over the subject area to make an all-around selection.
With the brush of that tool, keep selecting until you cover the whole subject area. You will see an ant-marching line around the selected area. By seeing that, you can know which areas are selected and which still need to be selected.
In some images, selecting the background areas are quite easy than selecting the subject. In that case, you can select the background in the same way above. After selecting, press “Shift + Ctrl + I” for inversing that selection if you are using Windows OS.
Using macOS, press “Shift + Command + I” to complete the inverse selection process.
Step-4: Correcting the Selection
The selection you made won’t be entirely accurate on a single try. To make as much precise as possible, you need to refine the selection carefully by taking enough time as the proper selection is highly required. The “Quick Selection Tool” may fail to select correctly on some sharp edgy areas, and some small areas can remain as not selected.
To select them properly and make the correction process easier, you need to smaller the brush size of the “Quick Selection Tool.” Then zoom the image and carefully select those delicate edgy areas. Keep doing it until you satisfy with all the sharp and edgy regions getting chosen adequately. However, there is another side of the coin that you may face.
While selecting the subject, some different areas of the background can also get selected accidentally. That’s pretty normal, and there is a solution for that as well—zoom in those additional selected areas and smaller the brush size. Then press the “Alt” button, hold onto it, and drag the cursor on those areas to deselect the unwanted areas.
Step-5: Select and Mask
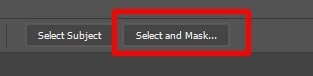
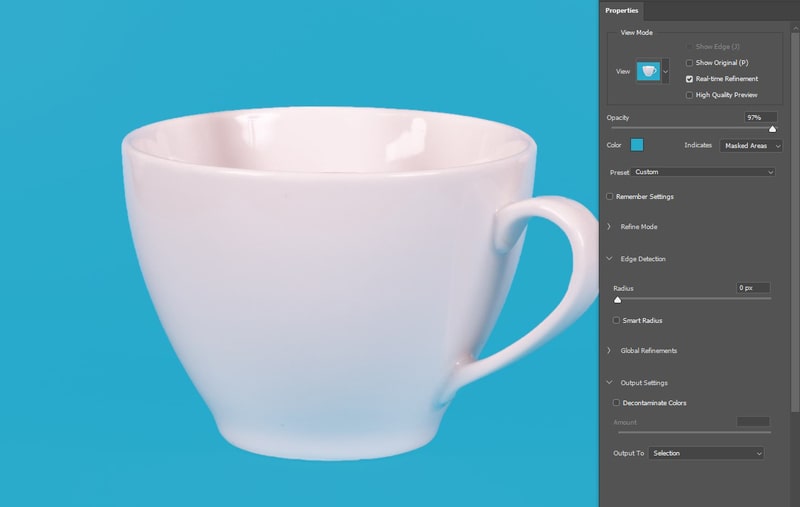
When the correction of selection is completed, you need to do the masking work. For doing so, you will see an option above the image named “Select and Mask.” A new panel will appear with some options as you click on it, and the background will be eliminated except the selected area.
From the panel at the right side of your image, there will be an option called “View Mode” at the top. You can change the mode from there, and setting it on “Overlay” will be beneficial. While doing so, keep the “Opacity” at 100 for the clearest visibility of the image edges.
You can set the mode as you want based on your necessity and which seems the most helpful.
Step-6: Refining the Edges of the Image
After doing all the tasks above, you need to refine the edges of the image. For the refining task, you need to find the specialist tool on the masking tab. There will be five tools on the left-side “Toolbar,” The second one will be the “Refine Edge Brush Tool.”
Click on the “Refine Edge Brush Tool” tool icon to access it for further refining tasks. Then drag the mouse cursor over the edgy areas to refine and polish them. Zoom in those edgy areas to avoid errors. Try to eliminate all the sharp edges to provide the image a smooth look.

This tool is the best for edge smoothening if those edges contain hair and are soft and delicate. Proper usage of this “Refine Edge Brush Tool” will eliminate all the sharp corners of those areas. Right below this tool from the “Toolbar,” you will see another tool named the “Brush Tool.”
There are some hard edges that the “Refine Edge Brush Tool” can’t eliminate. The “Brush Tool” comes in handy in those cases and removes those hard edgy areas. In this way, those stubborn areas also become smooth.

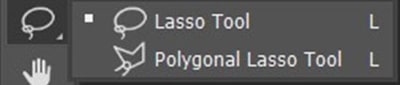
If you feel some of the subject areas are still missing after the refining task, you can use the “Lasso Tool” and the “Polygonal Lasso Tool.” Some extra and unwanted background areas can also remain selected, and you can eliminate those areas using those two tools. Those two tools will be on the below part of that “Toolbar.”
Step-7: Settings Adjustment and Color Decontamination
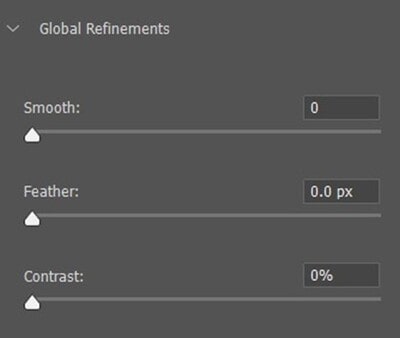
On the panel that arrived when you clicked the “Select and Mask,” you will see some options after expanding the “Global Refinements” option. The first option is “Smooth,” and you can eliminate the jagged lines with its help. This editing option is pretty helpful for the selections which come with comparatively clear edges.
The next option is “Feather,” and you can add feathers to the edges of the selected area. In this way, you can soften those edgy areas of the selection. Next, you will see the “Contrast” option with which you can easily do this edge hardening task by increasing contrast on the edge pixels.
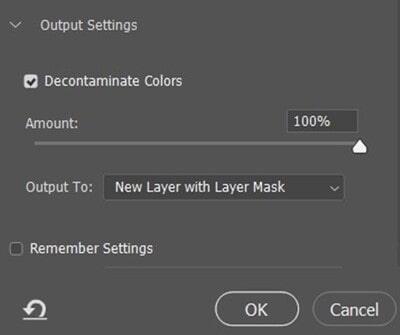
At the bottom of that panel, you will find the “Output Settings” option and click on the drop-down icon to expand it. From there, put a tick sign beside the option named “Decontaminate Colors.” While doing so, keep the “Amount” level at 100%. There will be another option as “Output To” and a box beside that below.
On that box, you will see five different options, and select one from there. Next, you need to choose the “New Layer with Layer Mask” option and press the “OK” button for confirmation.
Step-8: Choose A New Background, import it, and Retouch the Subject and New Background
When the image subject becomes transparent, you are all set to add new background. At first, you need to choose a background that suits the subject you have made transparent. Then, import that image to the Photoshop tab from the files section of your laptop or desktop.
After importing:
- Hold its menu tab.
- Drag it to the tab of the transparent subject.
- Leave it there.
Then the layers of both the subject and new background will be shown in the “Layer’s Panel” section. Don’t forget to keep the subject layer above the background layer unless the subject won’t be visible.
Then, fix the size of the new background by using the “Transform Tool” by pressing “Ctrl + T” or “COMMAND + T” (for Mac). Next, use the handles and hold the “Shift” button to fix the background-size and aspect ratio. After doing so, use the “Crop Tool” to crop some parts from the whole image.
Benefits of Changing Image Backgrounds
You may wonder about the necessity of changing background from the images. But you will wonder more after knowing the demand of background changing in the commercial sectors. When the dull and lifeless raw background is removed from an image, it opens many opportunities for the subject in the picture.
The list of benefits that you will get after changing the raw background of the image is pretty long, and those benefits are:
- Getting rid of the dull, lifeless, boring, and unwanted raw backgrounds from the images
- For commercial usage, background changing plays a vital role as the raw backgrounds won’t be suitable
- You can add a different background that suits the image subject as you want, and the image requires
- It is possible to provide the image subject a whole new look through background changing
- The audience will like the picture more when you change the raw backgrounds and use catchier and appealing ones
- By using the amazing tools and techniques of Photoshop, you can provide your image a stunning look
FAQs on Change Background in Photoshop
Can I add a white background after eliminating the raw background from an image?
For commercial usage, adding white backgrounds to the product images is much crucial.
Is it important to remove edges and corners of the subject after background removal?
You can also use the “Lasso Tool” and the “Polygonal Lasso Tool” to complete the edge refining task successfully.
Why should I need to keep the subject layer above the background layer in Layer’s Panel?
To keep the subject layer visible and in front of the new background, you must keep it above the background layer in “Layer’s Panel.”
Conclusion on Change Background in Photoshop
Background changing is the introductory part of the whole image-editing lesson. However, it is a crucial task that is highly required for commercial and product photography usage. Proper background changing of images from every sector of photography through Photoshop can impress the audience. That’s why learning how to change background in Photoshop will take you closer to become a professional editor.
There are different methods for background changing in Photoshop based on the image complexity. For the images with the most complex subjects and backgrounds, you should use either the “Pen Tool” or the “Quick Selection Tool.”