Merge images with another image or suitable background is nothing new in the Photoshop era. Everyone expects their captured image to look more beautiful, attractive, and perfect. But unfortunately, all the photos don’t always result in how we want those to be.
While reviewing the image after clicking it, we may see some unusual and unwanted things in that image. And we never want something like people blinking, animals moving, or traffic passing to come in the frame of our pictures. So to eliminate those unwanted materials, merging two images that suit each other becomes crucial.
As a result, learning how to merge images with background in Photoshop will help you perform the task. If you are a photographer or an editor, it will help you when you are short of perfect raw images. But you must do it perfectly to blend those two images and make them look realistic.
The Necessities of Merge Images with Background in Photoshop
As a newcomer in the photographic and editing sector, you might wonder about the necessity of blending two different images. This method collects two almost the same category images and then merges those into an attractive single picture. Let’s see why it is crucial for the photographers and editors:
- When you are short of perfect raw images, merging them with a more suitable background will make it more attractive.
- Merging a picture with a background also becomes crucial when there is movement in your composition.
- It will assist you when you click the subject and background well, but unfortunately, both in different pictures.
- This will significantly assist you in wildlife photography as capturing the moving animal subjects is way harder there.
- You can also eliminate the presence of any unwanted person or subject from the actual background by replacing it with a suitable new one.
- This will come in handy when you just had one chance to capture any rear shot, and the background has not resulted in the way you want
How to Merge Images with Background in Photoshop – The Proper Step-by-Step Guide
Merge images with a suitable background is one of the most basic editing skills to acquire in Photoshop. But this basic skill can backfire if you don’t learn it properly but try to apply it. Without any exact method, trying to fulfill this task is entirely like boating with the knowledge of the direction.
When you follow the correct method of doing this task, you can quickly achieve your desired result. Along with following the right path, you must practice it repeatedly to be better at it. Then after being sure of it, you can apply it to merge or blend two different images in Photoshop.
Now, here is the step-by-step guide that you need to follow for merging a picture with a suitable background in Photoshop:
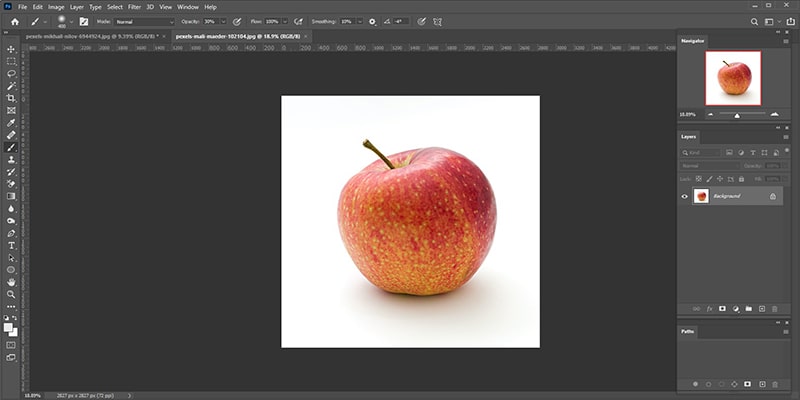
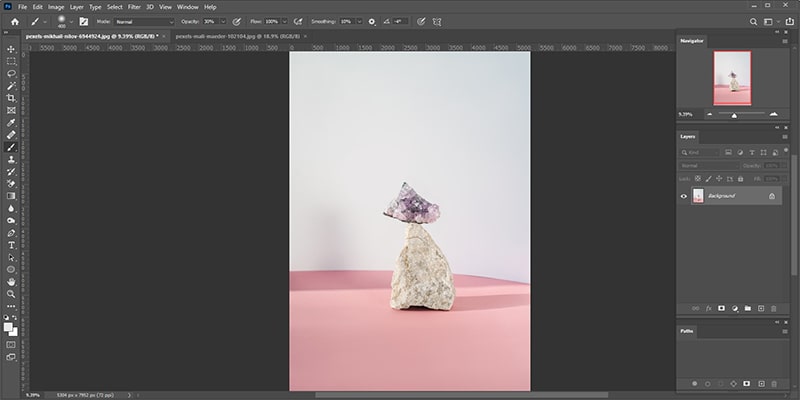
Step-1: Select Two Images for Merging
Before you start blending two images, you need to select the ones first to perform the task. But you can’t just pick two images randomly and start merging them. You need to consider some things before choosing your two pictures for the blending purpose.
1. Focal Length of the Lens
The first considerable thing is the lens’s focal length that you have used to capture those two pictures. This lens focal length must be the same for both photos to blend those perfectly. It won’t be a good idea to combine a 24mm lens image with a 45mm lens background.
Because the different focal lengths of those two pictures won’t allow you to perform a seamless blending. That’s why you must select images with the same focal length to merge them easily.
2. Lighting Condition
Lighting plays a huge part in every image, and while blending two images, it becomes way crucial. If you use images with vastly different lighting, the merging will become unnatural. The same lighting is desired, but if that is hard to match, a slight difference in the lighting is acceptable.
3. Resolution and White Balance
There is no option of blending two images that have different resolutions. If you can somehow merge them, the result will be catastrophic. So, it is a must to use pictures with the same resolution if you want to combine them for converting into a single image.
You should also avoid too complicated images to perform the merging task and choose comparatively simple ones. It is not always required that two photos be clicked in closer periods. But in every case, the white balance of both the subject image and background image should be as close as possible.
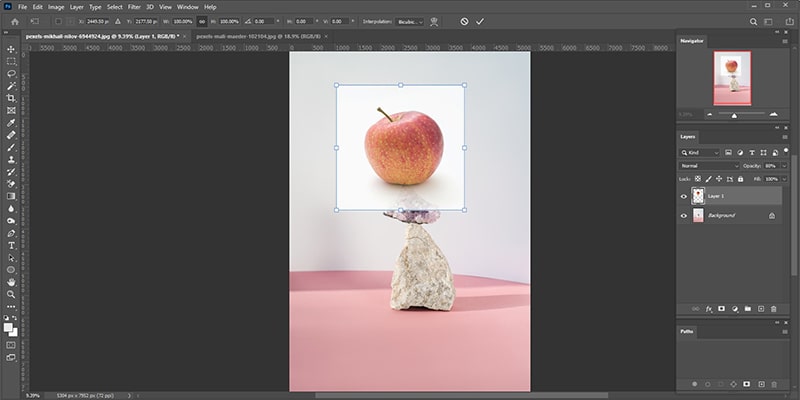
Step-2: Open Both of the Images in Photoshop
The desired task here is to place the image which contains the subject in the background image and merge them. To fulfill this task, you first need to import the photo that includes the subject. Then, you must pick the image in which the subject looks comparatively more minor.
Otherwise, you will have to upscale the background image, which may affect by losing the quality and resolution of that picture. So, when you work with a minor subject, you will have to downsize the background, which won’t loosen the quality.
As you upload the first image containing the subject, you will see its layer appearing in the “Layer’s Panel.” Besides its layer name, there will be a lock sign, and you need to click on it to unlock it to the photo layer from the background layer.
You also need to convert it to a smart object by first right-clicking on the layer and selecting the “Convert to a Smart Object” option. Then comes the turn to import the background image into Photoshop. You can either follow the drag and drop method or open it manually from the file’s section.
The next task is to align this newly imported image with the previous one. Next, you need to downsize the background image to make it suitable for the subject. Select the background layer first, and press “Ctrl + T” to bring out the overlaid X on the image.
With the help of the transform handles of the overlaid X, resize both the images correctly to match each other. As you won’t upscale any of those images, there won’t be details loss in the picture quality and resolution. Also, since those images are converted into intelligent objects, resizing will be comparatively easier.
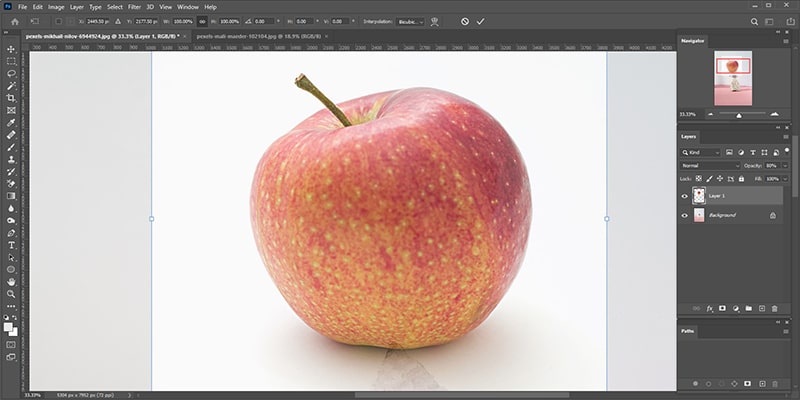
Step-3: Positioning of the Images
You need to find the most suitable place in the background image to place the subject of another image. Then, decrease the opacity of the subject photo to put it in the right spot. After setting it properly, you can increase the opacity again through the given slider.
While dealing with the perfect subject placement, you might also have to rotate that image a bit. As you have used the “Free Transform” tool to resize the picture, you can even turn the picture by using this tool. You should use the “Move Tool” as well for correctly positioning the images.
Please make sure both the images are aligned nicely, and there is no possibility of looking it unrealistic anyway. If the positioning is not done correctly, you will find it difficult to merge the images later. Along with that, getting your desired result from the pictures may also get delayed.
Step-4: Create a Mask and Eliminate the Unwanted Parts
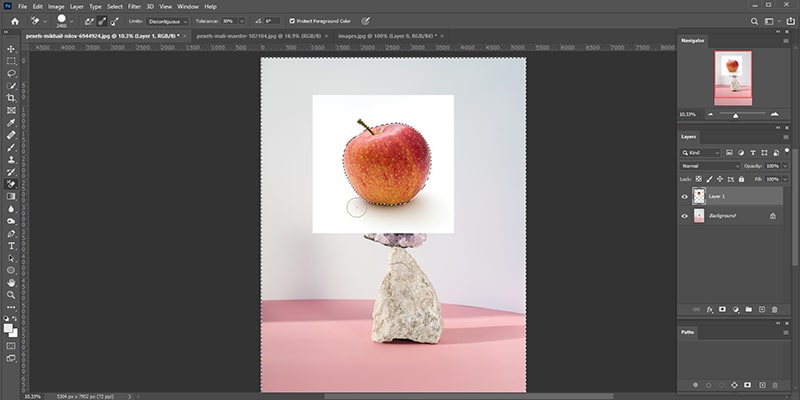
After placing and positioning, the part of masking the layer and elimination of the unwanted parts. At first, you need to locate and click on the “Object Selection Tool” and select the square area around the subject. As a result, you will see an ant-marching dotted line appearing around the subject.
The selection won’t be perfect on a single attempt, and that’s why you need to retouch it for a proper selection. For this task, you will have to use the “Quick Selection Tool” to add the small areas or to deselect some small unwanted parts. When the selection is made, you will have to locate and click on the “Add Vector Mask” icon.
This icon will be situated at the bottom-right corner of the screen, and clicking on it will eliminate the unwanted parts. Next, you need to smoothen and brush the sharp edges of the subject to provide a somewhat realistic look. You will have to use the “Brush Tool” for the task, and it will be on the toolbar at the left of the screen.
While selecting this tool for further usage, you must set the color black and the opacity at 100%. Then, you can make the brush size small or big and set the hardness as per your necessity to smoothen the subject. Then use this “Brush Tool” very carefully to eliminate the whitish or blackish vibe from all sides of the subject.
With the help of this tool, you can even correct the shape and size of the subject and make it even more attractive.
Step-5: Retouch the Whole Image
Some parts of the merging process have been completed by doing the tasks above. But the blended subject will look a bit hard and unrealistic in the background. At first, you need to copy the subject’s layer containing the image you just edited. Then, select the layer either from the layer’s panel or from the Photoshop window.
Then press “Ctrl + J” from the keyboard or right-click the mouse, and then press the “Duplicate Layer” option. It will create another same layer of the subject on which you can do the rest of the retouching tasks. You can start retouching from the color grading of the subject, which lies in the “Properties” section.
This section is situated in the bottom-right corner of the Photoshop tab, and as you click on it, several options will appear. First, select the “Level” option to correct the color grade and do the necessary editing from there. Then from the same options panel, enter the “Hue/Saturation” section, and perform the required retouching.

The next phase of retouching is about color balancing. You can access there in the same way as previously from the “Properties” section. After entering there, you will see the major colors present in the subject. From there, you can change the effect of any color through the given slider.
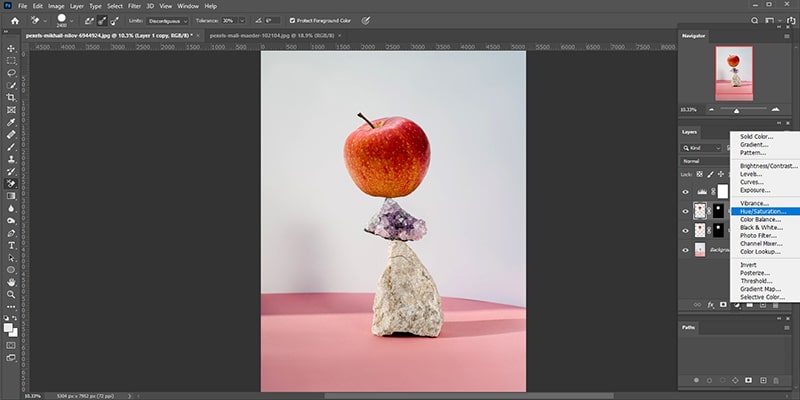
Even it possible to change the “Color Tone” of the subject from this section of “Properties.” But one thing must remember is that you will have to keep the duplicated layer selected while performing all these retouching tasks. Some parts of the subject may remain dark or even excess bright or white.
So, after you are done with the color balancing and color tone correcting, the next task is making the subject more vibrant. In this part, you will have to create a new layer first from the option below the Layer’s panel.
Then fill it with “Gray” color from the “Edit” section of the menu bar situated in the top portion of the Photoshop window. Following that, you will have to create a clipping mask of this layer with the duplicated subject layer.
As a result, a whole new layer will be in front of you with the shape of the image subject, but in gray color. Then comes the part of blending this layer with the subject layer. Select both the layers first and then locate the “Blending Mode” section to perform this action.
It will be situated just above the layer’s panel and beside the opacity panel. In this part, you will see various blending mode options and choose one that looks the most attractive.
Next, change the “Exposure” of both the “Dodge Tool” and “Burn Tool” and set it in more than fifty if not set from before. Use these fantastic tools to remove dullness from the subject and make it more contrasty.
But you must remain careful while using these tools as overuse of these will be catastrophically bad for picture merging. Because applying these tools with inexperienced hands will burn the image.
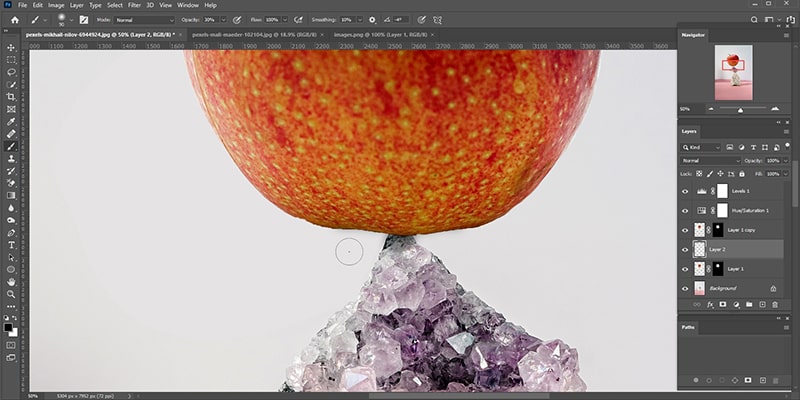
Step-6: Creation of Subject Shadow
The creation of the subject shadow is an essential task that needs to be performed for picture merging or blending. Because, without the subject shadow, blending will never look natural even a bit. First, make the actual subject layer that has not been edited by clicking on the “Eye” icon beside the layer name.
Then create a new layer like shown a while ago in the previous method. Locate and select the “Brush Tool” and change the size and hardness of this tool before you try to apply it. You will also have to change the foreground color to black to use the “Brush Tool” for shadow creation.
Once you do it, you are all set to apply this tool to create shadows around the subject. But the fact is, you can’t just develop shadows randomly all around the subject. Instead, find out from which angle of the background image the light is coming from, and it will lead you to the source of that passing light.
On the opposite side of that light source, you will have to brush with the “Brush Tool” to create shadows. You will apply the shadow effect on the side should look a bit darker and gradually blend with the brighter area. So, use the “Brush Tool” on that portion by lowering the opacity of the shadow layer.
Making the applied shadow a bit blur will make it more realistic to look at. But, no worries, as you can do it from the “Filter” section situated in the top panel section of the Photoshop window. After entering there, you will find various blurring options to apply in your merged image.
At the end of shadow creation, if you feel the shadow is too dense for the image, you can work on that. Just lower the opacity of the shadow layer, and keep lowering it until you feel satisfied with it.
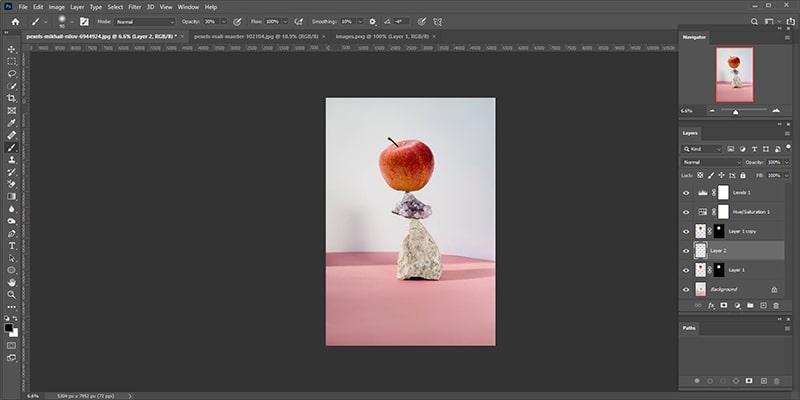
You will also make further adjustments to the merged image from the menus situated in the top menu bar. You need to go to the “Layers” menu from the top menu panel first. In that part, you will find some options appearing, and from there, click on the “Flatten Image” option.
That will be the final touch on merging a picture with another background in Photoshop. As the final result arrives, you will see that the merged picture became way attractive. At the same time, the merged image will fulfill all the lacks of the two different pictures.
It is a crucial method to apply when you have two suitable images in your hand, but none of them are individually perfect.

FAQs on Merge Images with Background in Photoshop
Why should I merge an image with another background in Photoshop?
What is the importance of creating a shadow of the subject in image merging?
Do I have to eliminate the previous background of the subject before merging it with a new picture with the background?
How can I erase the sharp edges of the subject after eliminating the previous background?
Final Thoughts on Merge Images with Background in Photoshop
Merging or blending two different images is one of the most crucial and basic parts of the Photoshop lesson. Many blending or merging types are available based on the image type and quality. Sometimes, just lowering the opacity of any image works just perfectly to complete the merging task.
But, as one of the most sophisticated merging types, learning how to merge images with a background in Photoshop is highly crucial. With the help of this, you will be able to create perfect combinations which are never possible through raw images. The path of image manipulation will become easier for you after learning this merging technique. If there is still any problem take help from the background editor or merge images online.
You may read: